Friday 27 May 2016

Badly Locked Bikes & Bundles of Kit


Bike theft is a perennial problem and unfortunately, very lucrative given there is a ready market for stolen goods. Thieves lack mercy and compassion.

You and I have a bond with those frame tubes, a connection to those components and little, personal touches-freedom, fun, friendship.

The thief sees cash, another order met, others a fleeting hit of heroin to mute the spiralling misery of addiction and their steadily collapsing veins.

Those years spent living and riding in London’s seamier districts cultivated a belt n’ braces pragmatism. Given theft is in epidemic territory, I’m constantly staggered by the numbers of sitting ducks-easy pickings for the light fingered. Take this fixed gear Trek spotted in central Coventry.

Yes its parked in very public locale’ but only secured by the top tube using a modestly priced armoured chain…This might look the part but easily defeated in a matter of seconds with bolt cropper, which the owner has thoughtfully left ample space for…

How about this no-name fixer and rather fetching flat bar Charge spotted outside Birmingham’s symphony hall... Again; tethered to an immovable object via a U lock, in a very public spot by their top tubes…Roomy enough for a brute force attack, wheels and other components are vulnerable to anyone of a dishonest mindset, equipped with a run-of-the mill multi-tool/set of Allen keys. 

These could then be broken for spares, sold on online auction sites, or built into a bike using a stolen frame, making its heritage much harder for rightful owners to spot (in the unlikely event they were recovered). Rule of thumb says buying the best locks you can afford- 10% of the bikes rrp is a good yardstick.

Some can defeat on looks alone but generally speaking, all decent locks buy us is time; time for a thief to be discovered or get frustrated and move on. Most work on the basis of sixty seconds. Longer and they’ll look elsewhere. The most professional will use vans and have various tools for defeating armoured cable, chain and shackle designs.

However, many simply use one system-combining a U lock and armoured cable/chain of similar quality can be enough to make a thief move on. Make it as awkward for them as possible. Fill the lock; keep the mechanism clean, lightly oiled and difficult for them to access. If it’s a pain for you, it’s all the more difficult for them and ultimately; the better your chances of remaining the rightful owner.

Expect a decent lock to weigh around the kilo mark- fine for carrying over the shoulder for a few miles but on longer commutes, these become decidedly uncomfortable, so best sitting in a pannier, or riding on their own frame or rack mounted bracket.

Sold secure are the benchmark most insurers go by and have three standards- Bronze, Silver and Gold. This denotes the time and sophistication required to defeat them. Bronze is ok for low crime areas but can be obliterated in sixty seconds using very primitive tools. 

Often regular commuters will leave their locks chained to bike stands and other street furniture-don’t. This makes thieves lives easier still, they note the lock, come back with the right tools-a row of bikes... gone.

Organised criminals often drive around in vans looking for and ultimately stealing bicycles/motorcycles. Takes six big men to lift a relatively small Harley Davidson but once inside, alarms and other security are instantly muted. Studies have also shown that even when crimes are being committed, members of the public tend to turn a blind eye...

Inspect potential hosts for weakness. Rusty railings are easier to cut through and gaffer/similar tape can hide evidence of cutting/tampering. Oh and make sure structures, such as parking meters can’t be unbolted, bikes lifted atop...Trees and other wooden structures should only be considered when your bladder is screaming defcon1.

Defeated by locks, the light fingered also take a shine to expensive components-stems, forks, derailleurs, saddlers etc. Arguably a commuter/daily driver shouldn’t be so exotic but hub dynamos and similar equipment is ultra practical. Replacement Allen bolts (Not the cheap as chips quick cam type) with unique keys are a wise investment, making “locusting” unlikely. 


Public service announcement served. Along with the Univega’s 2x9 transmission update, I’ve upgraded the front stopper in favour of these Avid shorty 4 cantilevers and compression less cables.

Setting up the Avids proved remarkably straightforward and this configuration offers improved modulation and feel with Microshift brifters compared with the TRP predecessors. Timely too; since I’m due to take delivery of a free parable design T2 trailer to compliment their Gorilla and Monkii cages. 

The latter has enabled resurrection of this Ibera stainless steel thermos bottle; consigned to my cupboard when it’s sprung cage bracket expired and replacement proved unavailable. Kindly Supplied by www.cyclemiles.co.uk to be reviewed in www.sevendaycyclist.com


Monday 23 May 2016

Lord of the Rings


Cyclo cross’s renewed popularity over the past decade, has given rise to a more civilian sub genre with additional bottle mounts, carrier fittings mudguard/eyelets. Gearing has also been tweaked to cover most bases, including the occasional, muddy race.

My ‘cross bikes are of the more traditional flavour, although I’m very fond of the gravel/adventure bike concept such as Genesis Croix De Fer. This; coupled with some recent mixed terrain blasting and John Moss’s recent Mango revisions got me thinking about my tubby tourer’s gear range.

Having plumped for 11-32 Tiagra cassettes last time round, the 22 tooth inner ring is pretty much redundant. Even hauling a trailer full of kit along forest trails and unlit roads. 44 and 32 teeth provides ample bombing, cruising and winching prowess.

Given the mix of road and mtb drivetrain, persuading its STX mech to behave impeccably across the range; let alone year round has always been a chore. Pleased to report its much happier skipping between a 44 and 32. Super crisp shifting and I’ve saved a few precious grams.Removal proved very straightforward and cost nothing; aside from ten minutes and a   few turns of the front mech’s adjuster screw to restrict travel.  

Pruning triples comes in and out of fashion. The late 80’s mtb explosion saw many experienced riders removing the big ring on their protégé’s bikes to prevent knee damage, especially in grass roots competition.

This concept was later advocated by some sections of the British mtb press in 1990/91 and one I embraced. Off came my trail hack’s biggest bio-pace, the middle and granny rings rotated for improved pedaling efficiency.

Ironic, given Bio-pace and its procession of elliptical imitators supposedly dismissed the dreaded dead-spot. We all slowly reverted to round; bio-pace, bio-strong et al became the stuff of ridicule and bike shop bargain bins.

Fast forward a few years and the dispatch mob were charging through the capital on mtbs with skinny slicks, single rings and closely spaced cassettes...

Talking of which, the 90s weren’t all about dodgy concepts and race frames passed off as trainers. One of my small but significant favourites was Kona’s spatter effect colour schemes, which meant riders could unobtrusively retouch those inevitable chips and scratches accumulated on the trail. Any enamel paint (or nail varnish) would do and over time, became a unique, customised pattern-no more fretting about precise matches.

  
Said strip was performed almost exclusively using The Full Windsor’s Breaker multi tool and captured relatively late in the evening, on a Sony Cybershot WX350.

I acquired this long zoom point n’ shoot primarily for capturing impromptu stuff while out riding; aside from the slightly pedestrian write to card speeds (common to most compact and bridge models) overall image quality; especially in lower light is surprisingly good.

Most chain breakers are fairly effective for occasional tweaks-I used a Specialized EMT around the workshop for several years before the pin and spreader slots eventually crumbled. However, the breaker puts this function and sheer leverage first.

It’s made from high quality loss cast and heat-treated stainless steel. Loss cast refers to a very old fashioned, though extremely precise manufacturing process where molten metal is poured into a wax mould.

Seven inches long and complete with a retro-looking leather pouch, designed to be hung from the saddle rails, top tube, or stem. There’s breathing space in here for tube and some mini pumps for a clutter-free effect.

Plug in 3,4,5,6 and 8mm Allen keys, T25 torx, spoke wrench, bottle opener and an extension bar for improved leverage sit in a terrace made from recycled butyl. Last but by no means least; a Phillips for taming those temperamental mechs, cantilever balance screws and sloppy brackets.

Racers needing to make very slight, split second tweaks will prefer the quick draw, flip-out simplicity of folding tools. However, that additional torque is welcomed on day rides and rough stuff/touring where efficiency trumps convenience.


Fettling also proved an excellent opportunity degrease the LX rings, purge some oily frame preserve and add a colour coat to the Univega’s previously primed chainstay chip. Now, you’ll have to excuse me; sounds like the courier has brought us some free parable goodies from Cycle miles www.cyclemiles.co.uk for review in Seven Day Cyclist. (www.sevendaycyclist.com)


Monday 16 May 2016

Bubbling Beneath The Surface...


The past ten days have been a roller-coaster ride of highs n’ lows; my illustrator, Michael J Murphy has brought the main characters in my series of children’s stories alive as Jpegs. 

Given digital media dominates and portable devices have become the viewing tools of choice; we’re considering releasing a narrated version for younger children.

In keeping with our everyday focus at Seven Day Cyclist (www.sevendaycyclist.com    https://www.facebook.com/Sevendaycyclistmagazine/?ref=aymt_homepage_panel ), we’re awaiting delivery of an interesting trailer or two.
Some of the team are leaving their wives behind and heading off for a quick gander at the Czech Republic...

My strange and some would say; irrational love of crumbling Soviet military/industrial sites, coupled with an uncanny ability to get arrested, detained and interrogated by the authorities means I’ll be testing kit on domestic soil through June…

A recent dry spell enabled me to slather some of my home brewed waxy preserve over the KA’s chassis and underside. 

Build quality seems an improvement over its predecessors, suggesting there’s some truth in the long held belief that last-of-the line cars were the ones to go for, since all the faults had been ironed out. That said; rust behind the filler cap remains as problematic as ever.

Moisture gets trapped between the rubberised seal and bodywork. A distinct lack of galvanising means the elements nibble away unsupervised until the bubbling becomes apparent. Thankfully, remedial action wasn’t too intensive. 

Having removed any flaking paint, I sanded the affected area; then added two light coats of Krust; a water-based neutralising agent before turning my attentions to my two-wheeled fleet while it cured.

Some minor play had crept back into the Holdsworth’s headset bearings, swiftly cured by a quick bit of spacer shuffling and introducing a 2mm “carbon” unit beneath the stem cap. 

Forty miles hence, suggests this unexpected flash of inspiration has solved the problem. 

WD40 water displacer is one of those truly iconic products; look in any household cupboard, garage, bike shop and chances are, you’ll find the blue aerosol (or 5 litre solution) sitting on a shelf/workbench.It’s not particularly kind to seals and other rubberised parts but inhibits corrosion, prevents squeaks, lubricates cables, pivot points, mechanisms etc. 

GT85 is another justly popular, Teflon fortified maintenance spray, which keeps these areas slicker for longer. It’s also owned by WD40 and they’ve also launched a bike specific GT85 range including bike wash, dry lube, degreaser and silicone polish.

While my preference (and that of many bicycle/motorcycle dealerships) errs towards high quality beeswax furniture polishes; dirt cheap, they achieve high quality, lasting sheens on painted, plated and polished surfaces with minimal effort. Silicone products also nourish plastics and rubberised components-suspension elastomers, seals being obvious candidates.

Traditionally, silicone based polishes-bike specific, or otherwise have tended to quickly cultivate grimy patinas. Credit where it’s due, while this formula still seduces some filmy grime, it is easily dismissed (almost as quickly as these U-locks) given a quick, soft-cloth onceover, though the lion’s share of protectant remains. Looking forward to putting the rest of their range through its paces...

John Moss is another perpetual fettler, perhaps unsurprising given his engineering career. In common with coach-builders and other engineering grade trades I’ve encountered in the past, he’s been trained to discover weaknesses and improve designs accordingly. His Mango being a prime example; Alfine 11sped hub, much bigger ring instated, gearing now permits 35mph at modest cadences and theoretically in excess of 80mph on a long descent!

Richard Ballantine once suggested that having motorcycle experience can be very beneficial when pushing recumbents hard-I was somewhat smitten with his “Speedy” during this period and would certainly indulge today...Along with some kind of 850cc trike project if other priorities and space permitted.

John affirmed that his ten years spent riding large capacity motorcycles develops an intuitive understanding of exactly when to push and of course, to back off.  He’s also learning to work with glass fibre and appears to have commandeered the couple’s trailer for solo shopping runs and other errands. The hitch is presently undergoing refinement so it tracks more accurately behind the Mango...   

Back to the KA

Next came three light coats of red oxide primer. Ideally a colour coat would’ve been applied but in my experience, these will keep the region solid and grot free. Before reinstating the filler cap assembly, introduce some decent quality, rubber friendly grease to the seal. It won’t cure the problem but greatly inhibits further bouts of grot and therefore, more intensive exorcism.

If you’ve bought a late model MK1 with no signs of corrosion in this region, I’d recommend a similar strip-out before filler and more serious intervention’s needed...

Sunday 1 May 2016

A Slippery Scapin's Starry Makeover


Increasingly superseded by stainless, chrome has long been synonymous with Italian manufacturers, despite Columbus recommending their tubesets were not subjected to acid baths, filing and similar torture...

Scapin are an Italian marque, renown for coating their steel frames internally with phosphate and nickel plating the exterior tubes. Allegedly, this was also for corrosion resistance, though I remain convinced aesthetics were the biggest pull. This particular example came under my radar, while I was mooching around Maldon Shot Blasting & Powder Coating’s bat-cave.

Closer inspection suggests it was fashioned from Columbus’ thin wall Nemo or Genius tubing. I strongly suspect it was originally part-painted like this Rossin but chemically stripped once the livery had begun losing its tenure and/or succumbing to stone chips and other cosmetic damage.   

Persuading stove enamel and 2pac finishes to stay put on partially/ plated framesets has presented headaches a plenty for paint-shops. Acid etch primers ruled by default but given a few years’, the livery tends to flake and peel where the two overlap.

This customer has chosen to leave the rear triangle in its original polished state. Aesthetics aside, this means chain slap and hasty wheel removals won’t leave unsightly calling cards. Graham carefully mummifies these with masking tape to rule out any pitting from blast media.

Having passed the threaded uni-crown forks through the iron oxide cabinet, Graham decides to sand the main triangle. He fears even a gentle grit could lift the nickel in places, which is not something that can be disguised with additional paint. 

Instead, he opts for an epoxy based zinc primer. Epoxy offers superior adhesion and interestingly, resists chemical attack better than others. However, they aren’t UV stable; hence polyester powder is the good finisher’s choice for colour coats.

After meticulous plugging and masking of head, seat tube and threaded areas, the frameset disappears beneath a powdery grey mist. Seven minutes and some perfectionist re-touching later, its spirited off for a ten minute bake in their gas oven.

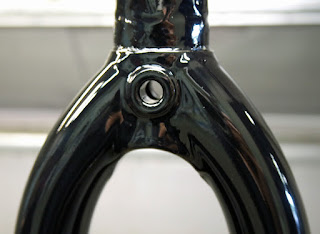
Monitoring progress around the seven minute mark, the powder has melted to a rich (and strangely attractive) grey skin. Next; Graham applies a gloss black, a common “colour” that including lacquer brings the price to £65 plus VAT. However, this is only the base for a very exotic commission.

Four minutes and some localised re-touching later, its back to the curing oven for another ten minute bake; I alter the camera settings slightly and sip some tea, while Graham heaves a huge box of powder across the workshop dung beetle fashion. “Sapphire Star clear coat” he shouts over. 

I’m told this acrylic is impregnated with tiny pigments of colour. The overall effect is timeless petrol blue under normal lighting but assumes a subtle sparkle on sunny days. It’s well known that colours have slightly unique characteristics, requiring different techniques but Graham explains; particular care is needed with this kind of specialist clear coats-including temperature. 

The Scapin must not be allowed to cool, otherwise crazing or clouding is on the cards-disastrous. Gun loaded with lacquer, he strides purposefully over to the oven, caresses the frame tubes, nods with a grin and retrieves the frameset.  

Powder lacquers always appear white, enabling the sprayer to see exactly where they’ve been. Anything other than exacting coverage here will ruin the effect but like any skilled trade, he makes this look effortless-done in five minutes. 

Back to the oven for another ten minutes, we’ve time to indulge in a biscuit; or three. Graham removes the masking tape while the adhesive is still soft and I get a final shot.  
Total cost is £162 including VAT.