Good Friday came along and after
a couple of weeks whizzing along the lanes and unmade roads aboard Denise, I
decided it was time for a good clean, polish, and some light rest. I also reverted
to the Peaty’s Link Lube All Weather, since it’s a bit more stoical than the
Motorex, but without attracting much grot.
I’d bought some replacement
bearings as a standby for when the OEM Stronglight balls get choppy and indeed,
this sealed cartridge bearing Tange come time the Stronglight needs retiring.
It was only a few quid dearer than the A9ST.
The generally dry spell had
presented opportunity to top up the waxy corrosion inhibitor on the KA and
Micra chassis, underbody, door and sills. It would cure quickly and lock the
elements out.
Naturally, I also treated my
steel framesets a quick blast through their “breathe holes”, since I was on
this corrosion busting mission. These and similarly small jobs sorted, I
decided it was time to dust the fixed gear winter/trainer down and give it a
few outings. Our first confirmed I’d the chain tension a little too tight,
inducing minor faff but I was more irked by myself not getting it right first
time.
It was tempting to replace the
budget chain for the higher end Izumi in some respects, but this was making
unnecessary work for myself, especially since the budget brownie hadn't covered
any significant mileage and would probably sit unused. Just a matter of sliding
the wheel slightly further forward in the dropouts and fine tuning with the
chain tugs.
Or so I thought… Regular washing,
waxing and lightly lubricating stuff extends component life considerably.
However, even simple drivetrains wear out and though I’d regularly replaced
chains, I’d not changed the ring, or sprocket in a while. During this
inspection, I also noted some corrosion around the frame’s chainstay bridge,
which had also spread to the right-hand stay. The only sensible option was to
strip the components and scrutinise properly, rather than speculate.
I generously grease stuff during
installation, so bottom bracket and other threaded components all spun free
with only modest effort.
Deep degreasing and close
inspection of the Genetic Tibia ring revealed some hooking and related wear, so
I ordered a replacement along with a 17tooth Halo fat sprocket. I’d a fresh
UN55 bottom bracket in stock, so plucked that out, since it had been over four
years since I last fitted one. The
biggest surprise was a healthy layering of Park Polylube TESTED: PARK
TOOL POLYLUBE 1000 LUBRICANT FOR BICYCLES clinging to the chain ring bolts
several years down the line.
The Mulo is arguably closer to a gravel, rather than cross build. Room for 700x40c, tapered head tube and bigger downtube for additional stiffness. On-One also opted for a more traditional mudguard bridge mount, albeit behind the wishbone mono-stay. The top tube cable run is also very different, but interestingly, On-One has retained cantilever (or V brake) posts. Legally, fixed doesn’t require a mechanical rear brake, since the transmission is recognised as a secondary stopper. Hence, I only use a front brake. More about that later…
Easter Sunday brought a blowout.
I was a few miles from home, really enjoying Denise’s responsive but reliable
persona. A loud pop was followed by a rapid and similarly audible hiss.
Rummaging through the Zefal Adventure R11 ZEFAL
ADVENTURE R11 WATERPROOF SADDLEBAG | cycling-not-racing I found four tubes.
However, seems I’d not patched two of them, evident when I began introducing
some pressure from the Muc-Off Airmach Pump.
Having found suitably sound butyl
and checked the rear Pirelli Cinturato for sharps and similar damage Pirelli
Cinturato Gravel M Tyre | cycling-not-racing I
whipped everything back together and got busy with the Muc-Off Airmach Mini
Inflator Pro. 55psi later I was homeward bound again. Having returned, I needed
to adjust the Suntour SE rear brake slightly. An easy fix-done in three minutes
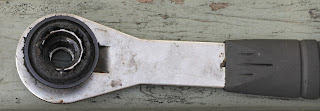
with a 16mm cone wrench, 5mm Allen key and ring spanner.
I’m pleasantly surprised by the
Velo Tool Mini Adjustable Torque Driver. Preset torque wrenches have been around a
while, but adjustable models are, in my view, what we need and becoming
increasingly affordable.
Ok, some folks will argue 4,5 and
6nm are still limited but they cover the sort of routine adjustments we’re
likely to make mid ride. Raising, re-aligning (or dropping) the saddle a few millimetres,
tweaking cleat tension, nipping stem, mudguard, bottle cage bolts tight etc.
Oh, obviously you’ll still need a multi tool for slackening duties, otherwise (and
in common with workshop models) you’ll risk damaging the mechanism.


