Showing posts with label Bicycle frames. Show all posts

Monday 30 December 2019

Knowing The Drill


 After the frenzied pre-Christmas preparations, the corridor linking Christmas and New Year can be perfect for catching up with friends and small jobs. Aside from ignition tumbler woes striking my KA, my fixed gear winter/trainer's seat post binder bolt needed replacing. 

Since it was secure and I didn't need to adjust the post height, I left it a couple of months. All the same, I wanted to avoid the expensive, titanium post/Cro-moly frame galvanic union.  One last try, with Torx bits confirmed drilling-out was the only option. 

Cordless drill charged, and bits found... 

I also harvested a compatible replacement bolt and collar, in case the 14 year old On-One also decided to give up the ghost. Knew they'd come in handy... Bike in the workstand, It took a few minutes cautious drilling before the once 5mm Allen head disintegrated. Thankfully the threaded section also required little coaxing. 

Much as I suspected, the On-One collar had succumbed to fatigue, so that was substituted for an Atomic22. Though not unexpected, it was still a relief to discover the post was also very mobile. I eased that free, removed the remaining greasy film and introduced a liberal helping of ceramic prep. 

While harvesting bolts, I also discovered two packet fresh 26x1.75 inner tubes. Timely, since my Univega's supplies were dwindling and I'd patched a few to their limit recently. I took this opportunity to carve another section from a dead 26x2.0 and make a seat collar boot for my fixed. 

Post reinstated, fasteners greased and snugged tight, I slid the boot so it obscured the frame's collar slot. 

In some respects I could've cut it longer, overlapping the post for optimal protection. 
However, this would've been as pain, should I need to re-tighten the collar bolt mid-ride. I also replaced the VDO computer head unit's battery.Mercifully, it has a memory function, which saves time and minor hassle. 

Those Raw flaps have made a huge difference to the amount of spray thrown over the bike, shoes and other riders. I've swapped the Topeak Shuttle for the Zefal Pulse Z2 to see how it performs on a small, compact geometry frameset. Oh, another opportunity to re-grease some small, easily overlooked fasteners too. 

Little jobs off the list, I've dedicated time to reflection, testing, day riding and a few projects I want finished, before 2020.  The holidays should always involve doing something different. Otherwise, life can feel like the stripped thread. Turning monotonously, without achievement. 

Gave myself a New Year deadline, for finishing a short story (at least in draft form) and have some other irons in the fire. Sleep-walking into a new year (let alone decade) invariably leads to disappointment, and is likely to accentuate any hint of the mid-winter blues.


Sunday 1 May 2016

A Slippery Scapin's Starry Makeover


Increasingly superseded by stainless, chrome has long been synonymous with Italian manufacturers, despite Columbus recommending their tubesets were not subjected to acid baths, filing and similar torture...

Scapin are an Italian marque, renown for coating their steel frames internally with phosphate and nickel plating the exterior tubes. Allegedly, this was also for corrosion resistance, though I remain convinced aesthetics were the biggest pull. This particular example came under my radar, while I was mooching around Maldon Shot Blasting & Powder Coating’s bat-cave.

Closer inspection suggests it was fashioned from Columbus’ thin wall Nemo or Genius tubing. I strongly suspect it was originally part-painted like this Rossin but chemically stripped once the livery had begun losing its tenure and/or succumbing to stone chips and other cosmetic damage.   

Persuading stove enamel and 2pac finishes to stay put on partially/ plated framesets has presented headaches a plenty for paint-shops. Acid etch primers ruled by default but given a few years’, the livery tends to flake and peel where the two overlap.

This customer has chosen to leave the rear triangle in its original polished state. Aesthetics aside, this means chain slap and hasty wheel removals won’t leave unsightly calling cards. Graham carefully mummifies these with masking tape to rule out any pitting from blast media.

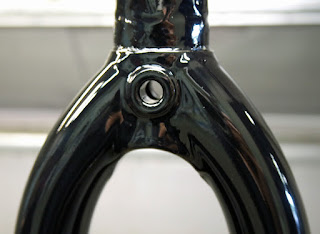
Having passed the threaded uni-crown forks through the iron oxide cabinet, Graham decides to sand the main triangle. He fears even a gentle grit could lift the nickel in places, which is not something that can be disguised with additional paint. 

Instead, he opts for an epoxy based zinc primer. Epoxy offers superior adhesion and interestingly, resists chemical attack better than others. However, they aren’t UV stable; hence polyester powder is the good finisher’s choice for colour coats.

After meticulous plugging and masking of head, seat tube and threaded areas, the frameset disappears beneath a powdery grey mist. Seven minutes and some perfectionist re-touching later, its spirited off for a ten minute bake in their gas oven.

Monitoring progress around the seven minute mark, the powder has melted to a rich (and strangely attractive) grey skin. Next; Graham applies a gloss black, a common “colour” that including lacquer brings the price to £65 plus VAT. However, this is only the base for a very exotic commission.

Four minutes and some localised re-touching later, its back to the curing oven for another ten minute bake; I alter the camera settings slightly and sip some tea, while Graham heaves a huge box of powder across the workshop dung beetle fashion. “Sapphire Star clear coat” he shouts over. 

I’m told this acrylic is impregnated with tiny pigments of colour. The overall effect is timeless petrol blue under normal lighting but assumes a subtle sparkle on sunny days. It’s well known that colours have slightly unique characteristics, requiring different techniques but Graham explains; particular care is needed with this kind of specialist clear coats-including temperature. 

The Scapin must not be allowed to cool, otherwise crazing or clouding is on the cards-disastrous. Gun loaded with lacquer, he strides purposefully over to the oven, caresses the frame tubes, nods with a grin and retrieves the frameset.  

Powder lacquers always appear white, enabling the sprayer to see exactly where they’ve been. Anything other than exacting coverage here will ruin the effect but like any skilled trade, he makes this look effortless-done in five minutes. 

Back to the oven for another ten minutes, we’ve time to indulge in a biscuit; or three. Graham removes the masking tape while the adhesive is still soft and I get a final shot.  
Total cost is £162 including VAT.