Tuesday, 15 August 2023

Bearings & Bright Lights...


 No sooner had I tweaked Ursula’s Hollowtech II bottom bracket bearings, the rear XT hub came out in sympathy. I’d been bombing along the backroads and trails, getting some decent miles on the Maxxis Ikon...Came home, rested the bike down and felt some slop. Gripping the rear wheel between thumb and forefinger confirmed this.  

Time was at a premium, so (before I started catastrophising and tearing everything down, replacing freehub bodies etc), the obvious thing to do was switch over to the Ryde Halo Spin Doctor combo, and then inspect the XT at a more convenient moment.  


Wheel swap and cursory inspections complete, now was the time to tweak the fixed gear winter/trainer’s chain tension-the “oh well, might as well, since I’m here” mindset.  Later inspection with a relatively calm mind confirmed it was just a matter of whipping out the 15mm cone and 17mm spanners and dialling everything snug.  


Oodles of grease clinging to the balls and races, locking the elements out. In my experience, Juice Lubes Bearing Juice is particularly good for hubs as they’re always turning. I’ve found it temperature sensitive, so in common with Green Oil Eco Grease can congeal a little when the temperature’s tanking, meaning headset bearings can feel like they’ve too much preload. At the other extreme, it assumes a lower viscosity and buttery smooth when temperatures hit the mid-twenties. An observation, rather than a criticism.  


Anyhow, the slop was easily corrected by loosening the locknut and snugging the cone tighter. Bearings were only replaced in April, races were good, and I double-checked the freehub, since I was about it. No obvious signs of wear there, either. I revisited things the next morning, tightened the cone fractionally, holding it in place while winding the locknut tight. Back went the cassette and lockring.  


A final neurotic turn and tug of the bearings, job doneAnyhow, since I’d switched to the Halo Spin Dr, which is a lovely hub, I’ll leave the Ryde/Spin Doctor wheel in situ. Schwalbe are sending me their Smart Sam tyres for testing. It’ll be interesting to see how they compare with the Maxxis Ikon.  


The Smart Sam are another cross-country tyre that’s been around a while and reckoned a competent all-rounder with decent rolling resistance on tarmac too, courtesy of the centre strip. Once upon a time, dual-purpose tyres were the worst of both worlds, ponderous on the road and toothless I the dirt. There’s obviously an element of compromise to be expected but they, like the Ikon, sound close to my particular mixed terrain niche.  


Talking temperatures and seasons, the nights are just beginning to draw, dare I say, sneak in a bit now and my attention is turning to new season lighting. I’m very impressed by Ravemen and their TR200 Rear Light. It’s a six-mode, sensored model producing a maximum of 200lumens. Braking functions have been a thing for a good few years now and predictably, have come a long way. Now, “braking” is a debated term.  


Accelerometer is probably closer to the mark as the internal sensor triggers the light when it identifies a drop in pace, or vibration. Earlier designs (c. 2017) were too sensitive and so triggered readily, which had a palpably negative effect upon battery life. This was particularly clear on sharp ascents, or when grinding along with a laden trailer en tow. I’ve noted tangible improvements in the past two years.  


I’ve a soft spot for Ravemen CLO6 Sensored Rear Light RAVEMEN CL06 SENSORED REAR LIGHT | cycling-not-racing (sevendaycyclist.com) , BBB Signal Brake Rear Light, Magicshine See Mee 2000 Version2. Then of course,  Ravemen TR500 USB Rechargeable Rear Light (500lumens) Ravemen TR500 Rear Light | cycling-not-racing (sevendaycyclist.com) which is in my view, particularly useful for trailers/tagalongs, tandems and other specialist builds.  


Back to the TR200, it has three steady and three flashing modes40, 20 and 5 lumens and a 200-day flash, flanked by 100-lumen rapid and slow flashing modes. Interestingly, the “braking” function is 100, not the 200lumens and is triggered for two seconds when it senses a loss of tempo.  


Run times on paper, seem favourable and there’s an auto kick down to the 5lumen steady, which is a welcome touch. The 260-degree lens with central convex and 4 LEDs bode well for presence and IPX6 should keep the elements at bay. Time and miles will tell... 


Wednesday, 9 August 2023

Temptations & Demons Purged


I’ve never been a spendthrift. Sure, I’ve enjoyed the odd splurge now and then. However, this tends to be when I’ve really wanted, or needed something. The fixed gear winter/trainer’s V2 frameset being a case in point. I’d been wanting one since 2003 but new parenthood, bills and related expenditure put this firmly on the back burner. I finally bought one (at a very compassionate price) for Christmas two years later.  


Made from in-house 4130 Cro-Moly and complete with matching fork, it was hardly exotic, or an expensive purchase but crucially responsive and engaging to ride. Fast forward 18 years and nothing remains of the original build, not so much as a spacer. The V4, though very worthy, and featuring more traditional (some would say better) seat stays failed to capture my imagination.  


A few years in the wilderness, the frameset has reemerged, (albeit with some obvious developments) as the Mulo. Back is the wishbone rear triangle and the blue livery, but a much beefier head tube and more refined dropouts. Theoretically, the head tube’s size and profile mean a bigger weld platform and bigger bearings, translating in a stronger, more responsive front end but without being unduly harsh.  


The Mulu has scope for 43mm (about 1.69 in) wide tyres too, compared with the V2’s 35mm limit. Now, you’d be forgiven for thinking I’d talked myself into indulging. My bike boner was indeed, leading me in that direction. However, when other costs were factored into the equation, the upgrades/improvements didn’t justify spending £435 (frame, fork and Aheadset). Besides, there was also the emotional bond between me and the V2 after all these years, many miles, and rider-centric evolutions.  


Instead, I decided it was time to get testing the eXotic Carbon Titanium Seat post. 350mm long, titanium refers to the cradle hardware and our 27.2 tip the scales at a feathery 173g. I’ve gone for the Selle Royal Respiro Sport Saddle since it was handy and generally very compatible with my derriere. (264g, on account of the magnesium rails but only 7g over the Selle Italia Turbomatic Gel Flow Team Saddle, which has carbon). Yes, I spotted the slightly upward tilt and levelled accordingly.  


Again, the fixed gear winter trainer is hosting-I'm leaving the Holdsworth’s Crank Brothers Cobalt3 and BBB Razer combo in situ. However, I did slip the post out and gave it a lick of grease, since I was there.   


The last thing you want to introduce carbon to, is grease.  

Having whipped the Genetic Syngenic TEST & REVIEW: GENETIC SYNGENIC SEATPOST (sevendaycyclist.com) out, I cleaned the seat tube with a clean rag dipped in solvent and added some gripper paste to the eXotic post. For the uninitiated, gripper pastes are designed to grip the post (or other part) reducing the torque required (and therefore, potential damage to the post/stem etc).  


Most brands seem to work just fine, although I’m personally fond of Muc Off MUC-OFF CARBON GRIPPER PASTE (sevendaycyclist.com) and more recently, Peaty’s Max Grip Carbon Assembly Paste Peaty’s Max Grip Carbon Assembly Paste | cycling-not-racing (sevendaycyclist.com) 


Formative impressions of the eXotic post are favourable, its light and gives that familiar buzz taming ripple across washboard tarmac. No creaking from the titanium hardware, either, which was similarly welcome, although during the first few outings, I’ve been keen to check they’re snugged tight.  


Talking of snugging things tight, while giving Ursula a well-deserved wash, I discovered some minor play in the bottom bracket region. Easily purged in a matter of minutes. For the uninitiated or unfamiliar, slacken the left-hand crank arm, turn the preload clockwise-fractionally using a 10mm Allen key, then tightening the 5mm Allen bolts to 14nms.  


The prevalence of carbon composites and other materials mean the torque wrench is as essential as the floor pump and excellent quality pressure gauge for home mechanics. Indeed, I’m coming to the point where compact torque wrenches are preferable for mid ride fettling and mechanicals. Most, including budget models, are perfectly accurate and pleasant to use. However, they’re also precision instruments.  


Always release the tension I.e., dial them out to zero after use and don’t drop them. Some sound an audible “click” when the correct tension is achieved, some go limp, others do both. Either way, do not go beyond this. I’ve lost count of the times when I’ve heard automotive fitters go three clicks past “just to be sure”. Not people I’d want working on my vehicle. 


This M-Part Torque wrench has served me well for over a decade. It’s a sub £60 model, which is intuitive to use and has an operating range between 2 and 15nms, which caters for a good spread of bicycle-related applications. JIS square taper and Octalink crank bolts, Hollowtech II bottom brackets, and cassette lockrings are obvious exceptions.


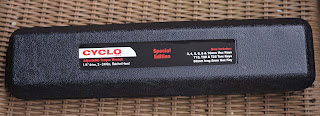
Weldtite has also sent me their Cyclo model, which casts the net a little wider range-wise (2-24nms). It also measures foot-pounds, extending its horizons to other applications, which may roll the dice in its favour.  


Some generic auction site tools range from 5nms upwards, which might be fine for stem and seat collar binder bolts upwards but rules out more delicate fasteners including bottle cages, mudguard, and carrier mounts, which are typically 2nms, or so. You pays your money....On that note, I'll close with my review of the Maxxis Refuse TR tyres MAXXIS REFUSE TR FOLDING TYRE | cycling-not-racing (sevendaycyclist.com)